• July 17, 2026

  • Why a 1000-Grit Whetstone Is the Best Place to Start

    Here is something the knife world does not always make clear:

    Getting a kitchen knife sharp enough for everyday cooking is not a mysterious art reserved for professionals. It is a skill that can be learned. The basic tools are affordable, the first steps are straightforward, and even a modest improvement in sharpness can completely change how a knife feels in the kitchen.

    A dull knife drags through food. It crushes herbs, tears onions, and forces you to use more pressure than necessary.

    A properly sharpened knife feels different. It moves through ingredients with less resistance and gives you greater control.

    You do not need to master every aspect of sharpening before you begin.

    You need one suitable stone, a basic understanding of what you are trying to achieve, and enough patience to learn from what you see, hear, and feel.

    This is where it starts.

  • The One Number That Matters Most

    Whetstones are identified by numbers. These numbers are called grit ratings, and they indicate how coarse or fine the abrasive surface of the stone is.

    Lower numbers, such as 200 or 400 grit, are relatively coarse. They remove steel quickly and are generally used for repairing chips, correcting damaged edges, or sharpening knives that have become extremely dull.

    Higher numbers, such as 5000 or 8000 grit, are much finer. They refine and polish an edge that has already been properly formed.

    For someone sharpening an ordinary kitchen knife at home for the first time, the most useful number to remember is:

    1000 grit.

    A 1000-grit stone sits near the center of the practical sharpening range. It is coarse enough to restore a moderately dull edge without requiring excessive time, yet fine enough to produce a clean and effective edge for everyday cooking.

    It is the workhorse of basic knife sharpening.

    It is where much of the actual sharpening takes place.

    The Shapton Ha no Kuromaku 1000 is widely recommended as a reliable starting stone. It cuts efficiently, requires little preparation, and provides clear feedback as the blade moves across its surface. It costs more than some entry-level stones, but for someone who wants to begin with one dependable stone, it is a strong choice.

    For a more affordable option, King produces several widely used 1000-grit stones. King stones have been familiar sharpening tools in Japanese homes and professional environments for many years. They are inexpensive, effective, and capable of producing an excellent working edge.

    A King 1000-grit stone can later be paired with a fine finishing stone, such as the King S-1, commonly described as approximately 6000 grit. However, a finishing stone is not necessary when you are just beginning.

    One 1000-grit stone is enough to learn the essential process.

  • When 1000 Grit May Not Be Enough

    A 1000-grit stone is an excellent starting point, but it cannot solve every problem efficiently.

    When a knife has small chips, a badly damaged bevel, or an edge that has been neglected for a very long time, a coarser stone may be necessary before moving to 1000 grit.

    Trying to repair serious damage entirely on a 1000-grit stone may take a great deal of time and effort.

    It is helpful to think of the sharpening process in stages:

    • A coarse stone repairs or reshapes the edge.
    • A medium stone, such as 1000 grit, creates the primary working edge.
    • A fine stone refines and polishes that edge.

    Most household knives that are simply dull, rather than damaged, can begin at 1000 grit.

  • The Thing About High-Grit Stones

    It is easy to assume that a higher grit number automatically produces a better knife.

    The logic appears simple:

    More refinement must mean more sharpness.

    There is some truth in this, but it is incomplete.

    Fine stones can create highly polished and refined edges. They can also improve smoothness and reduce visible scratches from earlier sharpening stages.

    However, very fine stones demand greater control.

    At higher grits, small variations in pressure and angle can become more noticeable. Depending on the stone, steel, amount of water, and sharpening technique, the surface may begin to feel sticky or uneven. Fine stones may also become loaded with steel particles and require cleaning or resurfacing to continue working effectively.

    This does not mean that high-grit stones are bad or unnecessary.

    It means that they are most useful after the basic edge has already been created correctly.

    Many working cooks prefer an edge finished somewhere between approximately 1000 and 3000 grit for daily food preparation. Such an edge can retain a degree of microscopic “tooth,” helping it engage naturally with tomato skins, onions, meat, and other ingredients.

    Other cooks and sharpeners prefer more highly refined edges, particularly for specialized Japanese knives, delicate slicing, or specific steels.

    There is no single finishing grit that is ideal for every knife and every kitchen.

    The important point for a beginner is this:

    A carefully formed 1000-grit edge is more useful than a poorly formed 8000-grit edge.

    The quality of the sharpening process matters more than the number printed on the stone.

  • What the Gritty Feeling Tells You

    When using a softer stone, particularly some King stones, you may notice a gritty or sandy feeling as the blade travels across the surface.

    This is not necessarily a sign of poor quality.

    The sensation comes from the interaction between the blade, the abrasive particles, the water, and the fine steel removed during sharpening. Together, these materials can create a slurry on the surface of the stone.

    That feedback can be useful.

    The resistance you feel through the knife may help you recognize:

    • where the blade is contacting the stone,
    • whether the pressure is distributed evenly,
    • whether the sharpening angle is changing,
    • and whether the edge is being worked consistently from heel to tip.

    Different stones produce different kinds of feedback.

    Some feel hard, fast, and clean. Others feel softer, muddier, or more abrasive. Neither sensation is automatically better. Each gives the sharpener different information.

    Learning to sharpen is partly about learning to interpret that information.

    You begin to notice how the stone sounds when the bevel is stable. You feel when the blade is lying correctly against the surface. You recognize when too much pressure is being applied.

    That sensitivity cannot be learned only by reading.

    It develops through practice.

  • What You Actually Need to Do

    The exact sharpening method depends on the knife and the type of edge, but the basic process for many ordinary double-bevel kitchen knives can be summarized simply.

    1. Prepare the Stone

    Read the manufacturer’s instructions before using the stone.

    Some stones must be soaked in water before sharpening. Others only need water applied to the surface and should not be soaked for long periods.

    Place the stone on a stable, non-slip base.

    A wet towel underneath the holder can help prevent movement.

    2. Choose and Maintain an Angle

    For many kitchen knives, a sharpening angle somewhere around 10 to 15 degrees per side is a reasonable general range.

    However, the correct angle depends on the knife’s original geometry, steel, intended use, and manufacturer.

    For a beginner, maintaining a consistent angle is more important than achieving a mathematically perfect number.

    Avoid repeatedly lifting and lowering the spine while sharpening.

    3. Sharpen Until a Burr Forms

    Move the blade across the stone while maintaining steady contact and controlled pressure.

    Work systematically from the heel toward the tip.

    As steel is removed, a very small fold of metal called a burr will form along the opposite side of the edge.

    The burr is an important sign that the sharpening has reached the very apex of the blade.

    Check carefully and gently. A burr can be extremely fine.

    4. Repeat on the Other Side

    Turn the knife over and repeat the process on the second side.

    Your goal is to create a burr along the full length of the opposite side.

    For an ordinary double-bevel knife, try to keep the work reasonably balanced. However, not every Japanese knife uses a perfectly symmetrical edge, so consider the original geometry before changing it.

    5. Reduce and Remove the Burr

    Once both sides have been sharpened, reduce the pressure.

    Use lighter, alternating strokes to weaken and remove the remaining burr.

    This final stage is essential.

    A knife may initially feel sharp while still carrying a fragile burr. If the burr is not properly removed, the edge may lose its sharpness very quickly during use.

    6. Clean and Test the Knife

    Wash the knife carefully after sharpening and dry it completely.

    Test the edge on food, rather than relying only on dramatic sharpness demonstrations.

    A tomato, onion, or sheet of ordinary paper can provide useful feedback.

    Never run a finger directly along the cutting edge.

  • The Only Standard That Matters

    Every beginning sharpener eventually asks the same question:

    How do I know when the knife is sharp enough?

    The answer is often simpler than sharpening guides make it sound.

    The knife is sharp enough when it performs the work you need it to perform safely and comfortably.

    When a tomato skin gives way without excessive pressure.

    When an onion separates cleanly instead of being crushed.

    When herbs are cut rather than bruised.

    When the knife follows the direction of your hand instead of slipping away from the ingredient.

    You do not need an edge that shaves hair in order to cook well at home.

    You need an edge that is stable, controlled, and noticeably more effective than the dull edge you started with.

    For many people, that result is achievable with a 1000-grit stone and a focused first practice session.

    Sharpening well takes time. Your first attempt may not produce a perfect edge, and that is normal.

    The goal is not immediate mastery.

    The goal is to begin recognizing what improvement feels like.

  • Keep the Stone Flat

    The condition of the whetstone matters almost as much as the sharpening technique.

    As a stone is used, its center may gradually wear lower than its edges. This creates a hollow or uneven surface.

    Sharpening on a dished stone makes it harder to maintain consistent contact with the blade. It can also gradually change the geometry of the knife.

    For this reason, whetstones should be checked and flattened regularly with an appropriate flattening plate or lapping stone.

    Draw pencil lines across the stone’s surface before flattening. As the surface is abraded, the pencil marks will disappear. When all the lines are gone, the stone is generally flat again.

    A flat stone makes learning easier and protects the geometry you are trying to maintain.

  • Home Sharpening and Professional Sharpening Are Not the Same Thing

    Learning to sharpen at home does not reduce the value of professional sharpening.

    The two serve different purposes.

    Home sharpening can maintain an edge, restore everyday cutting performance, and help you understand your knife more deeply.

    Professional sharpening may involve much more:

    • repairing chips and deformation,
    • restoring the blade’s geometry,
    • correcting uneven bevels,
    • preserving or recreating the shinogi line,
    • maintaining the ura and urasuki of single-bevel knives,
    • refining kasumi or mirror-polished surfaces,
    • and balancing sharpness, durability, and intended use.

    This distinction is especially important with traditional Japanese single-bevel knives.

    A yanagiba, deba, or usuba should not be treated simply as one half of a Western double-bevel knife. The front bevel, the flat area near the edge, the shinogi, and the concave ura all work together as a carefully designed structure.

    Incorrect sharpening can gradually distort that structure.

    For these knives, learning the correct technique from a knowledgeable sharpener is strongly recommended. Significant repairs and geometry correction are often best entrusted to a professional.

  • A Note on What Comes After

    The purpose of this article is not to lead you immediately toward the most complicated possible sharpening practice.

    It is to reduce the distance between you and a knife that works properly.

    But there is a much larger world beyond 1000 grit.

    There are natural finishing stones, synthetic stones with very different characteristics, and steels that respond differently to pressure and refinement. There is the relationship between edge polish and food, between blade geometry and cutting resistance, and between a sharpener’s touch and the final behavior of the knife.

    In Sakai, the professional sharpeners known as togi spend their careers exploring that world.

    Their work is not limited to making an edge sharp.

    They shape the cutting geometry, refine the surfaces, preserve the balance of the blade, and reveal the performance intended by the blacksmith and the knife maker.

    A home-sharpened edge and a professionally finished Sakai edge are not separated only by different tools.

    They are separated by different depths of experience, observation, and practice.

    Learning to sharpen at home can help you appreciate that difference more clearly.

    Once you have felt how much attention is required to maintain a stable angle for only a few minutes, you begin to understand what it means for a professional sharpener to repeat precise movements over an entire career.

    For now, however, the starting point remains simple:

    One stone.

    One number.

    Your own kitchen knife.

    That is enough to begin.

Types of Whetstones

Owning a fine knife means choosing the right whetstone to care for it. From coarse to finishing stones, each plays a role in sharpening and maintenance. Understanding their differences helps you keep your blade at peak performance and know how often to use each one.
Types of Whetstones

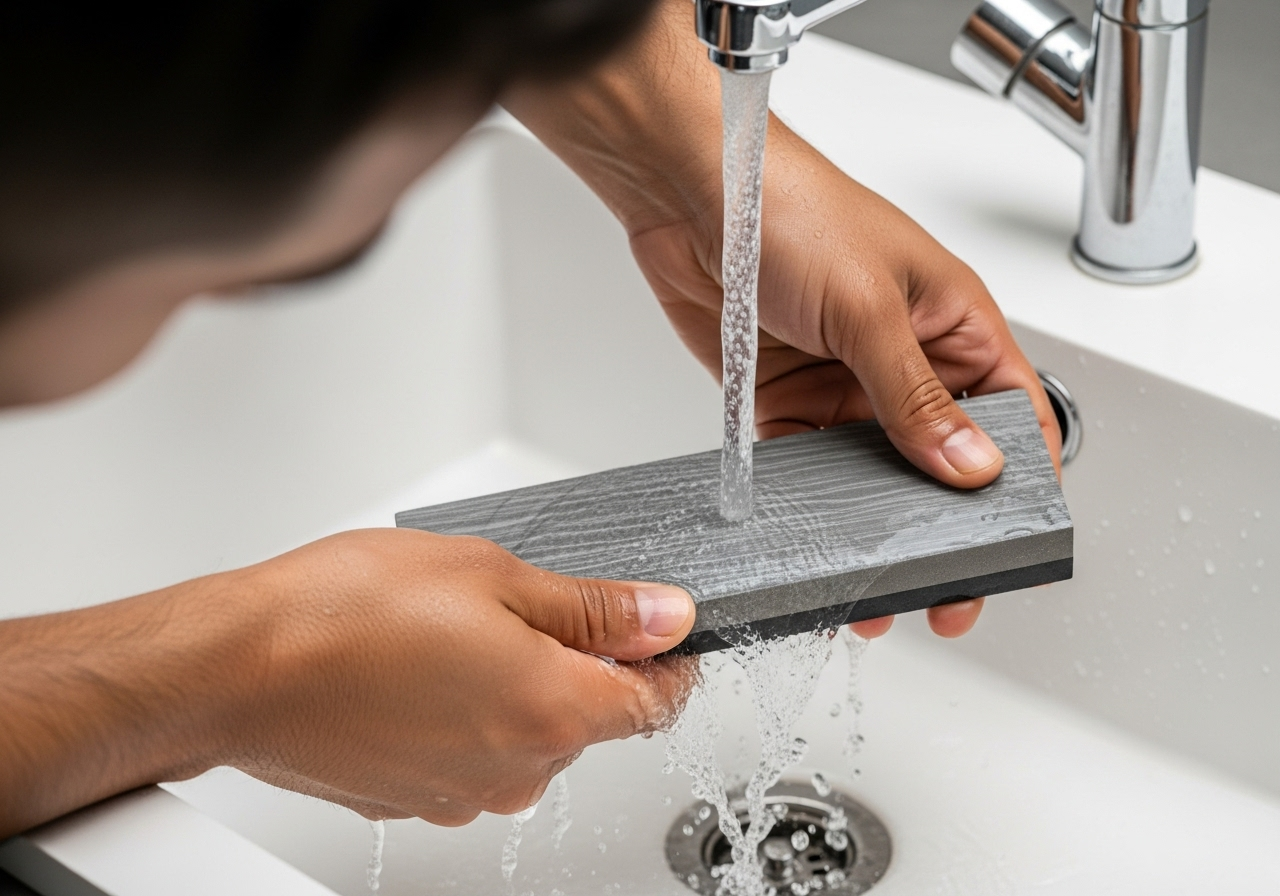
Daily Care of Whetstones

Whetstones need only minimal upkeep, yet issues like warping or denting can affect their performance. With proper care, your stone stays in top condition—ensuring precise, effective sharpening every time.

Daily Care of Whetstones
  • japanese_knife_made_in_Sakai

    1. Forged in the Legacy of Sakai

    From Sakai City—Japan’s renowned birthplace of professional kitchen knives—each blade is crafted by master artisans with over six centuries of tradition. Perfectly balanced, enduringly sharp, and exquisitely finished, every cut carries the soul of true craftsmanship.

  • 2. Thoughtful Care for Everyday Use

    Every knife includes a hand-fitted magnolia saya for safe storage. Upon request, we offer a complimentary Honbazuke final hand sharpening—giving you a precise, ready-to-use edge from day one.

  • 3. A Partnership for a Lifetime

    A KIREAJI knife is more than a tool—it is a lifelong companion. With our bespoke paid aftercare services, we preserve its edge and beauty, ensuring it remains as precise and dependable as the day it first met your hand.